Showing posts with label Crafts. Show all posts

Monday, September 12, 2011

Shaker Woods, Christmas in the Woods

Some of you in the Ohio, Pa. and West Virgina areas may be familiar with Christmas in the Woods at Shaker Woods Festival in Columbiana, Ohio. We have visited there in the past and it's such a fun place to shop for handmade crafts and to indulge in delicious foods.


This year's dates to visit are on October 8th, 9th and October 15th, 16th. We may go this year since we haven't been there in a while. The grounds are beautiful and the smell of food cooking is heavenly! My husband would go just for the food!


The last time we were there, there was a crispness in the air and that cup of hot coffee, hot chocolate or hot apple cider is divine! Entertainment will be provided by B.E. Taylor. If you missed my previous post on B.E.  Taylor, you can find it here.


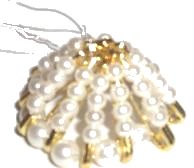
The craftspeople make their crafts as you watch. So many things to choose from and you can get your Christmas shopping done in one place. If you want some information you can visit their website. http://www.christmasinthewoodsohio.com/index.shtml

All pictures here are from their website. http://www.christmasinthewoodsohio.com/gallery/index.php?x=browse&pagenum=1

You can view many more there. Have a wonderful week!

Tuesday, March 29, 2011

Paper-Doily Wreath & More From Martha Stewart

A delicate-looking wreath that creates the magical effect of candles flickering in the snow is easy to make and surprisingly sturdy. Wreath frames are strung with twinkling lights that are nestled in frothy, doilylike paper bouquet holders known as "Biedermeiermanschetten."

Read more at Marthastewart.com: Paper-Doily Wreath - Martha Stewart Crafts


With their motion frozen in clear glass glitter, coniferous trees and reindeer encircle hurricane lamps lighted from within by tall, rose-hued candles. Here, the candleholders are elevated on glass cake stands, then faux snow is dusted around them.

Read more at Marthastewart.com: Glittered Candleholders - Martha Stewart Crafts


Transform old magazines into glittered tabletop trees with this easy -- as well as kid-friendly -- step-by-step process.

Read more at Marthastewart.com: Easy Christmas Crafts, Homemade Gifts, Gift-Wrapping Ideas - Martha Stewart

Magazine Christmas Trees


Create cute snowman greeting cards or gift tags with extra buttons and a bit of thread.

Read more at Marthastewart.com: Easy Christmas Crafts, Homemade Gifts, Gift-Wrapping Ideas - Martha Stewart

Button Snowman Cards


Rickrack -- wavy cotton trim -- is easily manipulated into seasonal symbols. Glue rickrack designs to blank cards, and use them as holiday greetings.

Read more at Marthastewart.com:
Easy Christmas Crafts, Homemade Gifts, Gift-Wrapping Ideas - Martha Stewart


Rickrack Cards


Enjoy being creative!


Enhanced by Zemanta

Thursday, March 10, 2011

Snowmen Luminarias

I thought these were so adorable. I used to set out luminaria's years ago, but nothing as cute as these. This idea comes from Better Homes and Gardens.

What You Need: 

•Round fishbowls
•White frost spray paint
•Orange oven-bake clay, such as Sculpey
•Golf tees
•Glass baking dish
•Black glass paint
•Paintbrush
•Silicone glue, such as E6000
•Crafting mesh
•Work gloves
•Old scissors
•Ruler
•Round can, such as an oatmeal container
•Ribbon
•Tea candle

Instructions:

1. In a well-ventilated work area, spray-paint the fishbowls. Let dry.

2. To make a nose, form a carrot shape from orange clay. Push a golf tee in the wide end for extra strength. Place on baking dish. Bake in the oven according to the manufacturer's directions. Let cool.

3. Glue a clay nose on each fishbowl. Let dry. Use glass paint to make the eyes and mouth. Paint quarter-size dots for the eyes and smaller dots for the mouth. To make snowman winking, paint one eye as shown with eyelashes in the corner.

4. To make a hat, wear work gloves. Cut an 18-inch circle from crafting mesh. Center the mesh over the can. Form the mesh over the can, folding the edge into a brim. Tie a ribbon around the brim.

5. Put a tea candle in the luminaria. Place the hat on top of the luminaria.

Saturday, December 11, 2010

Beaded Angel

She's a cutie!

Materials:

•12x small 2.3cm safety pins

1x 12mm bead for head

1x 12mm bead cap

1x 8mm pearl for the body

12x 6mm pearls for the base

54x 4mm pearls for the dress and arms

42x 3mm beads for the wings and halo

80cm's 28gauge wire


This little angel is adorable and can be used as tree ornaments, present toppers or given as small christmas gifts.


Fill the 12 safety pins with the 4mm pearls, you will need 4 on each pin closing them as you go.

Cut 5.5 inch (14cm) or wire and thread it through the head of each pin as shown, placing a small 6mm pearl in between each pin. Secure them by placing them into a circle and securing the wire closed by twisting the ends together.

With 5 inches (13cms) of wire thread it through the ends of the safety pins and secure into a tight circle to form the skirt of the angel. Don't cut the wire.

Thread the ends through the large 8mm pearl to form the body and secure the wire and cut off any excess wire.

Cut 15 inches (40cm)of wire and thread on 12 x 3mm beads for the halo. Centre the beads on the wire and bring both ends of the wire though the bell cap and the 12mm head bead. Separate the wire and bring one end through each side of the body bead to form the wings.

Add 12 x 3mm beads to each wing wire and bring it back through the body bead to form a loop, then add 3 x 4mm beads and 3 x 3mm beads, miss the last 3 beads and thread the wire back up through the first 3 beads. Twist the wire around itself to secure. Do the same thing again for the other wing wire.


http://www.craftbits.com/project/beaded-angel

Friday, December 10, 2010

Jumbo Craft Stick Angels

I love these whimsical looking angels!

Materials:

•l jumbo craft stick

8" X 1" strip of any scrap material

2" piece of poster board for the heart

jute, yarn, or twine for the hair

fine line black marker

pink marker or crayon

medium black marker

white glue or hot glue

These are great as gift tags, and then they can be used as ornaments. They can also be made using regular sized craft sticks. 1. Tie a bundle of yarn, jute, or twine to use for the hair. ( Wind around your fingers, then tie into a bundle in the center, and cut the loops at the ends.) Glue it to the top of a jumbo craft stick. 2. Use fine black marker, and draw on the facial features. Use a pink marker or crayon to make circles for the cheeks. 3. Tie strip of scrap material around the craft stick, the way you would tie a scarf around your neck. Glue in place to secure. Bring the two ends of the scarf down to the sides of the craft stick and glue them in place. This will look like a dress. 4. Cut out a heart from poster board, draw lines all around the outside edges, and print anything you wish in the heart. Glue it on the front of the craft stick. 5. Using fine line marker, draw a line down the center of the exposed craft stick, to indicate two legs. At the bottom of the craft stick, use the medium marker to color in the shoes. 6. At the neck, glue a bundle of whatever you have on hand,( jute, twine, yarn, torn strip of fabric or ribbon). 7. Make a loop of scrap jute or material, and glue it to the back of the craft stick for a hanger. Easy, but cute!! This project was contributed by Emilda Harrington


http://www.craftbits.com/project/jumbo-craft-stick-angels

Tuesday, October 26, 2010

Belle Angel

Designed by Karen Booy

Materials Needed


8" of 3" wide Sheerstar Wire-Edge Ribbon*, White w/Gold Stars and Gold Edges
24" of 6" wide White Tulle w/Gold Sparkles*
3/4 wooden bead
Mini-Curl Hair
6" of 1/4 wide gold ribbon                                   
1/4" wooden star, sprayed gold
1-1/2" Gold Elastic Cord
Q-tip and pink powder blush
Black Acrylic Paint
1 Novelty Wedding Ring
Low-melt Glue Gun
1-1/2 inch gold liberty bell

Instructions:

Gather the 8" of Sheerstar wire-edge ribbon along the top wire by pulling on both ends of the top of the wire ant once and gather fabric to the middle to form a small circle. Twist the two wires together and cut off excess. Glue center back of dress. Glue the 1-1/2" gold liberty bell to the inside of the dress.
Glue the wooden bead to the top of the dress for head. With black acrylic paint place two dots for eyes on the head. Use a Q-tip to apply pink blush for cheeks.
Cut a 5" white pipe cleaner. Bend in half and then bend each half in half again to form elbows. Glue first bend in back of angel's head. Glue wooden star spray painted gold to center of arms.
Glue mini-curl hair to top of head.
Glue the wedding ring to top of angel's head to form halo.
Fold gold elastic cord in half and tie knot at end. Glue to top of head for hanger.
Fold 6" tulle with gold sparkles in half to 3". Tie a bow measuring about 4" Across and glue to back of angel to form wings.
Tie a small bow with the 1/4" gold ribbon. Glue under angel's chin.

I love angels. My mother made me several for my tree and I even made a couple myself. Credit for this one goes to  http://www.allcrafts.net/

Zuzu Bailey from It's a Wonderful Life: Look, Daddy. Teacher says, every time a bell rings an angel gets his wings.

Followers

Popular Posts